Tag Archives: Selection Set

Editing Elements

In the last two quick tip articles we looked at ways to select and isolate elements in ARCHICAD. In this video, I review the different options for editing groups elements in ARCHICAD. Selecting and isolating elements is very useful, but only in as much as it allows you to quickly model and manipulate the model.

The options for editing groups of elements are:

  1. Element Settings (Com + T)
  2. Selection Sets (Com + Opt + T)
  3. Renovation Palette
  4. Relink Home Story (Right click)
  5. Pet Palette (not included in video)

Here is the video on the first four options for editing settings:

Selecting Elements

Working efficiently in ARCHICAD is critical, but not always easy. There are so many ways to model or draw everything, it is hard to know if you are using the most stream lined process.

A few things can help speed up your modeling and navigation work. In a series I am working on for the next Lunch and Learn presentation, we are going to explore the following:

  1. Efficiently Selecting ARCHICAD elements
  2. Isolating portions of a view
  3. Editing elements and groups of elements
  4. Efficient modeling
  5. Efficient drafting and drawing

The first series is covered here in the following videos:

Selecting Elements –

1) Find and Select

2) Selections Palette

3) Arrow Tool Options

4) Marquee Tool Options

5) Selecting Elements by Tool or Element Type

3D View to 3D Document

The view map should include a source view associated with each 3d document. This is true for reflected ceiling plans, detail axons, whole building foundation diagrams or any other view where view and content will need to be maintained and updated. In this post I will explore creating a foundation axon document that can quickly be updated to add new foundation elements, both 3d & 2d, without losing previously documented content, alignment or view settings.

Screen Shot 2015-07-10 at 3.28.18 PMScreen Shot 2015-07-10 at 3.28.26 PMScreen Shot 2015-07-10 at 3.29.09 PM

The 3d view that a 3d document is created from should come from a camera or saved 3d window in the view map for consistent view angle creation. It should be saved to the view map with predefined view settings; if a layer combination doesn’t exist for the content you want to see, create one. The view settings should not be set to “custom” for any of the view map settings.

navigator- view map

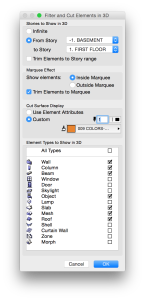
Additional view content restrictions may be applied, but difficult to replicate if the model or content change. Things like marquee restrictions, cutting planes or filter and cut elements in 3d can be difficult (but not impossible) to replicate when the 3d document needs to be rebuilt from a source view. To ensure these settings can be duplicated with updates to 3d model/document content, these settings need to be documented, such as hotspots and marque or cutting plane locations or screen shots.

filter-cut in 3d

One tool that can be invaluable (and is widely underused) for 3d document rebuilding is the selections palette. Once you have the content isolated in the 3d window, select it and save it to the selections palette with a name that relates to, or matches, the view map name for the 3d window or 3d document.

Selections

Using this palette you can open the camera view, re-select the original elements, add any new elements to the selection and isolate in the 3d window. The selection palette should be updated for future use with this new selection.

Screen Shot 2015-07-10 at 3.28.18 PMScreen Shot 2015-07-10 at 3.28.26 PM

Now just redefine the 3d document (in the project map > 3d document settings) with current window settings and your document will match the original camera angle, cone, and drafted content alignment; but will include the new model elements.

Screen Shot 2015-07-21 at 8.50.07 AM

Screen Shot 2015-07-10 at 3.29.09 PM

Efficient Selection & Editing

There are dozens of ways to make selections (of tools and placed elements) in ArchiCAD, and some are better for certain functions or results. Some of the key methods of selecting elements are:

There are many combinations of each of the selection methods listed above that can improve efficiency in editing elements too.

Example 1: use the Filter and Cut Elements In 3D settings to isolate out just windows and doors in 3d, then use Find & Select to further isolate only widows of a certain size or location for editing will quickly narrow down for global changes to these windows only.

Example 2: Use the Filter & Cut Elements option to isolate a range of stories of the model in 3D, then use the Eyedropper to activate the Object tool, then use a Select All to select the objects visible in the 3D window.

This may seem like a lot of steps, but when used efficiently it is a huge time savings over tediously trying to track down specific elements, or selecting one at a time or even in small groups. Here is a quick (±8 minute) video of some of the features listed above

EDIT SELECTION SETS

The Selection Set Pallet

The Selection set pallet is often forgotten; and its features have certainly been growing over the past few software versions. Look through some of the options available for editing multiple element types in one click. We can change multiple element types Layers, Pens, IFC function, Inter/Exter Location, Renovation Status and Structural Function.

The Renovation Status function is Incredibly helpful when assigning elements to be demolished early in a remodel project.

If you do not know about this pallet it can be accessed directly through your Info Box, it is the hammer icon to the left of your layer drop down. Play around with this if you don’t use it already, it is a huge time saver!

Screen Shot 2014-09-19 at 9.58.33 AM