Category Archives: Graphic Overrides

Drafting Fill Types

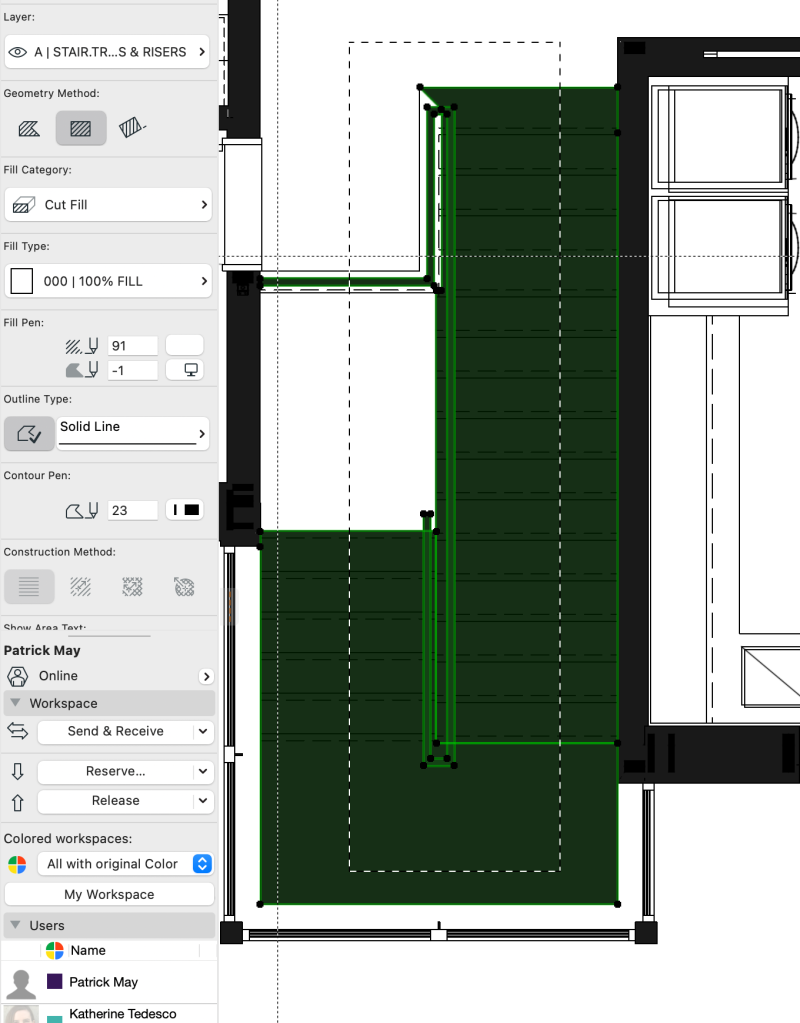
Drafting and masking fills are occasionally necessary to make our plans clean and tidy in final documents. It is important to use the correct fill category though. In the attached screen shots, we are preparing marketing and presentation plans, and fills are helping out the stairs; but the fills applied were cut fills, so they show as black pochè when the presentation plan Graphic Override is applied. Cut fills should be reserved for building materials, cover fills for surfaces, and drafting fills for drafting.

Clean up fills set to “Cut Fill”
Switching fills to “Drafting Fill”

Interior Iterations

In this particular project, we are late in the game and need to run some options through our model, as suggested by the Interior Design Team. I could save out a .pln or duplicate the teamwork file (see the BIM Manual for pros and cons of various iteration methods), but in this case, I was able to run 3 different surface options and 2 different stone slab configurations through 3 rooms without having any impact on the documents or even the model.

Here are 3 (1-3 minute) videos on steps I took to make this as efficient and nondestructive to the model as possible.

  1.  Using Graphic Overrides to switch between surfaces:  https://youtu.be/_5A93hL7o6E
  2. Using the surface painter to reassign surfaces quickly and easily:  https://youtu.be/fhDYh7DoNaA
  3. Using the Renovation Filter to pin elements that may not be permanent to the model:  https://youtu.be/pGGZAgzIjdQ

Graphic Overrides in Elevation

We can change the background color of uncut fills in elevation and interior elevation with a simple graphic override rule. This simplifies the need to use surface colors, and juggle a lot of different surfaces in each view. A basic GO rule will allow you to control the color of individual surfaces, while maintaining the surface fill pattern.

This can be used for sections and interior elevations as well.

Collision Detection

With the increase in MEP and Structural integration into our ARCHICAD models, we have started to explore the Collision Detection features in ARCHICAD. These have been baked into our template and explained in the BIM manual. For those who may be interested in trying this feature out, but are not using the current template, this video explains the settings:

Graphic Overrides!

Almost all projects have been migrated to AC20 now, and we have just run into the first “special case” for the new Graphic Override feature. Since we use 3d Documents for Reflected Ceiling Plans, we don’t have the advantage of full control over the door or window graphics or even appearance; they show as their literal cut regardless of door settings or Model View Options. In this case, we simply wanted to hide a couple of doors in the RCP; the folding doors on the right side of the image below:

screen-shot-2016-09-15-at-2-10-17-pm

To do this, we just took the Graphic Override for RCP’s and added a new Graphic Override Rule (Hide Doors):

screen-shot-2016-09-15-at-2-11-09-pm

This rule simply has a criteria that requires the override to apply to Doors 224 & 235 in this project. Then the Override Style is set to override all Lines to Pen 91, Fills to Empty Fill with Pen 91 for Foreground Pen 0 for Background.screen-shot-2016-09-15-at-2-11-22-pm

The result is exactly what we wanted to see; doors are there, but not visible in the documents:

screen-shot-2016-09-15-at-2-11-35-pm

It is important to note that this solution does not resolve the Pen and Fill issues we see with saving DWG files; and further exploration is needed to find a solution for exporting DWG files without these doors showing up on our consultants plans.