Option Click will collapse or expand all subfolders in the navigator (project map, view map, layout book, and publisher).
Collapsing Navigator Menus
3 Replies

Option Click will collapse or expand all subfolders in the navigator (project map, view map, layout book, and publisher).
Working efficiently in ARCHICAD boils down to isolating out only the portions of the model you need to view. Viewing the entire model at all times is inefficient and ineffective, since plans can look to cluttered, 3d can be too slow, and section and elevation views may show more content than is relevant to the work that needs to be done.
Isolating elements out is done by the following methods (and different methods may be more useful in certain views than others):
The following video quickly covers most of these methods of isolating elements in plan and 3d.
BIM6x wrote about collapsing/expanding all folders in ARCHICAD for easier navigation. I suggest you take a look at their article here.
For us, what this means is, finding that specific view map/layout book/library manager element is actually pretty easy. A fully expanded view map (see below) can be a lot to scroll through to find the folder or specific drawing/view you need.

Hold down alt/option key and click on the folder dropdown for the elements you want to collapse. In this case it is the view map project name list.
Now when you expand the folder out again (without the alt/option key held), you get a fully collapsed view map that you can expand folder by folder to find the exact view/layout you are looking for.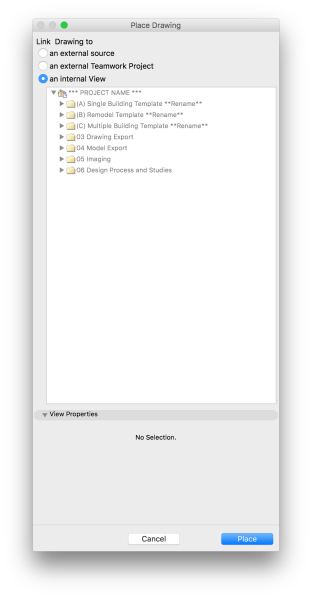
This is a mac function, not specific to ARCHICAD. So it will work on any folder/subfolder navigation within ARCHICAD; such as the Project Map, View Map, Layout Book, Publisher, Place Drawing dialogue, or the Library Manager. It also works in the finder in list view.
The Quick Solution
Without getting into too much detail about the use of Source vs. Linked markers, I want to present a strategy for tracking down each marker type for given views. There are several ways to find a views source and linked markers.
First, there is a setting to show/highlight the source markers. If there is a reasonable density of source markers, it becomes easy to discern between the source and linked markers.

There is also a setting in the work environment to adjust the color of the highlight from standard yellow to any color or RGB code.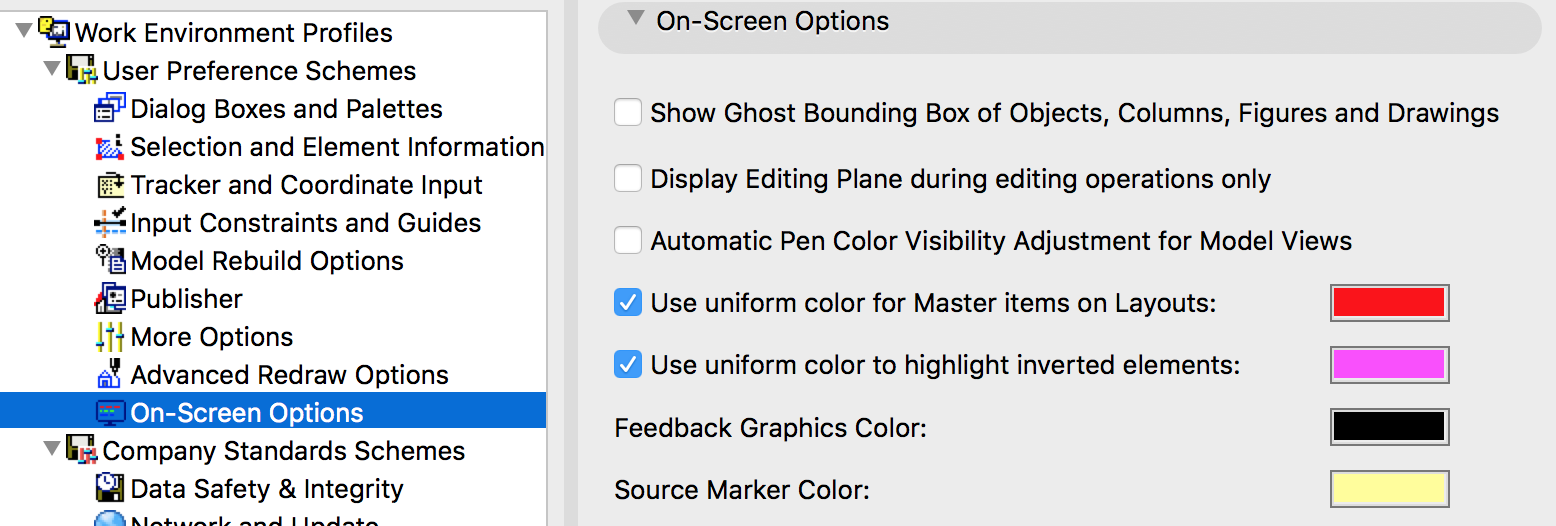
This has limited efficacy, since what you normally see is something like this:

The Correct Solution
So a simpler, and better solution is to obtain a direct connection to the source marker and a list of the linked markers. First, click on any marker, linked or source, or open the view from the view map or project map. Once the view is open, click on it, and select the project map from the navigator. The current view will be shown in Bold in the project map list.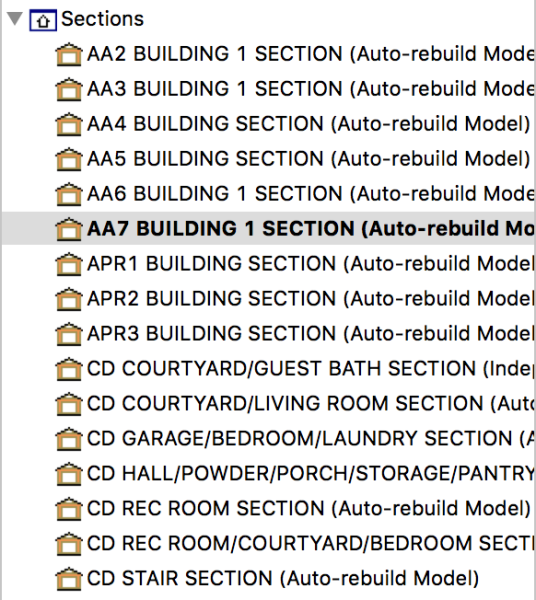
From here you can right click and select either “Select N marker on the Home Story and zoom to it”, or “Find Linked Markers”.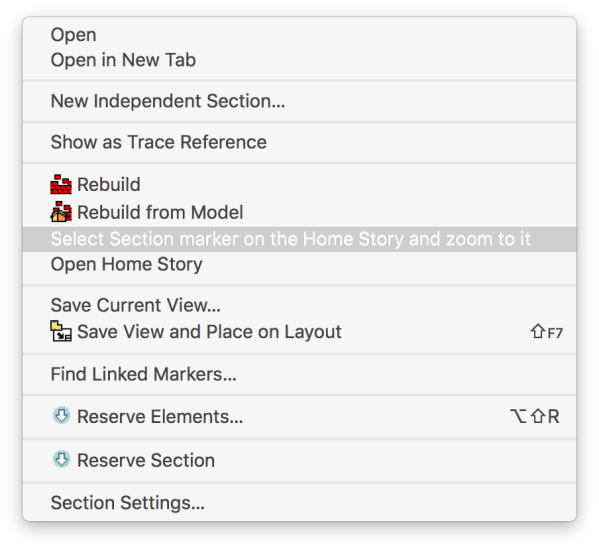
The first option very simply zooms to the location of the source marker and selects it. The second option provides a list of all linked markers associated with that source view. If there are multiple instances or references to a single view map item in several markers, this will give a list of the marker type and location, and allow you to jump to that linked marker directly.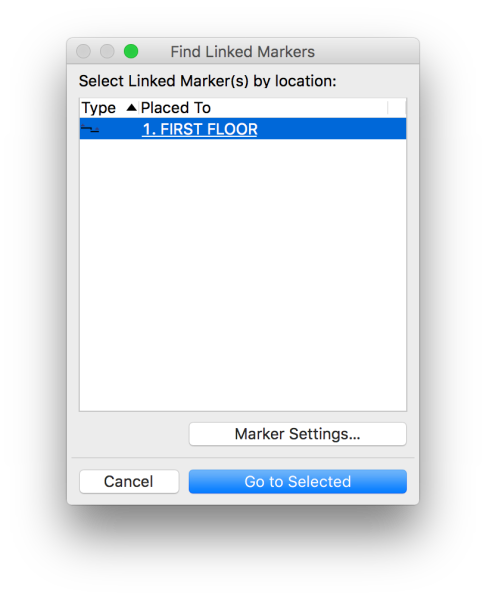
For more information on linked vs. source markers and how they work see:
In ARCHICAD 19 interior elevation markers have the ability to limit the horizontal range, or be set to infinite.
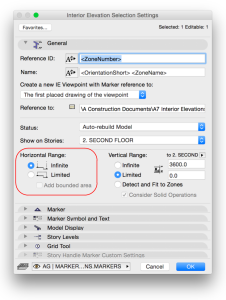
Horizontal Range Settings in the I/E Marker
Even with the Horizontal Range set to Infinite, the limited line exists, but is not active. This limited view line does however, impact the <ZoneName> auto-text naming for the I/E. It can rename the Interior Elevation to the zone its “off” extents line extends to. So if you find a stubborn interior elevation name, don’t jump to overwriting it right away. Turn on the Limited setting and review where that limiting line is set to. If you drag it back to the I/E marker boundary, then turn the Horizontal Range back to Infinite, the name should show up correctly.
Remember, there are many places and ways to override virtually everything in ARCHICAD, and most of them should just be avoided (the exceptions being anything built into the template).

Sitting Room North Elevation Shows as Main Stair Because of Invisible Limited Range Line
There are several ways to use the navigator/organizer functions to produce a final set of documents. Some are easier to manage, some are better for maximizing flexibility. Some view map organizations have the advantage of being easy to set up and add to through the CD phase. Some navigator/view map management practices are just horrible for everything.
Here is a post with a great 10 minute video from Shoegnome explaining the Navigator vs. Organizer and what the pieces of the navigator (Project Map, View Map, Layout Book and Publisher) really are. One of the best parts of Jared’s post is the graphic explaining how one portion of the navigator relates to the next and really builds it up to more than its own parts.

What this really means for detailing and the details structure is that a single source for details is possible, but that each unique detail should have its own source in the view map. There may be a Project Map item named 1″ Roof Details that has all standard roof details. Each detail on that window should then be saved into the view map with its own name and view settings, so that you will have 1″ Roof Details in the Project Map saved as Eave Detail, Ridge Detail, Barge Detail… each with unique view (Layer, Scale, MVO, Dimension Style, Zoom settings) in the View Map. The detail Views should then be placed to the appropriate layout.
This organization then has the advantage of quick, consistent, reliable and easy placement of linked markers. Linked markers should always link to the view map. If a marker links to a drawing on a layout the markers reference can potentially become severed if the drawing is moved to a new sheet. If the linked marker is linked to the first placed view of a view map item, that drawing can move anywhere, it can be cut and pasted, deleted and replaced, etc. and the linked marker will always re-reference the placed view.
 Its important to note this only applies to linked markers. Source markers always have their own unique relationship to the Project Map > View Map > Layout Book. If you are working on a project that already has a different View Map structure, or that already has its linked markers set to “The selected drawing” (layout item not view map item) special attention will need to be taken when setting up layouts or rearranging drawings and layouts. If a linked marker is linked to a layout drawing instead of a view map item, and the drawing is cut and pasted to relocate to a new sheet, it will loose the relationship to the drawing and appear as a yet to be placed drawing.

To move a drawing to a new layout from a project already set up incorrectly, use the organizer to move the the drawing. Drag the drawing from one sheet to the new sheet in the layout book portion of the navigator.
RECAP & SUMMARY:
I want to stress again, if your markers are linked to layout items, not copy (or cut) and paste to relocate drawings, your linked markers will loose their reference to the drawings. If you are just starting to set up and build your views, or just starting to layout markers, each view that will go onto a layout should have its own view map item, and all linked markers should reference The first drawing of the selected view.
There will be more to come on this topic, and possibly some new additions to our BIM Manual. For now, don’t hesitate to ask if this is in anyway unclear.
